Blog
Unheated or Just Well Lit? Sapphire Checks You Can Do at Home
Most sapphires you see for sale are heat-treated to improve color and clarity. That treatment is usually harmless, stable, and widely accepted. But sometimes you want to know if a stone is genuinely unheated. You can do a surprising amount of checking at home with simple tools. These checks won’t replace a lab report, but they will point you toward likely signs of heating — and tell you when to send the stone to a gem lab.
What you’ll need
- 10× loupe (standard jeweler’s loupe). This is the single most useful tool.
- Bright LED flashlight or daylight-equivalent lamp.
- Polarizing tool — polarized sunglasses or a camera polarizing filter.
- Black cloth to set the stone on for contrast.
- Tweezers or a soft cloth to hold the stone safely.
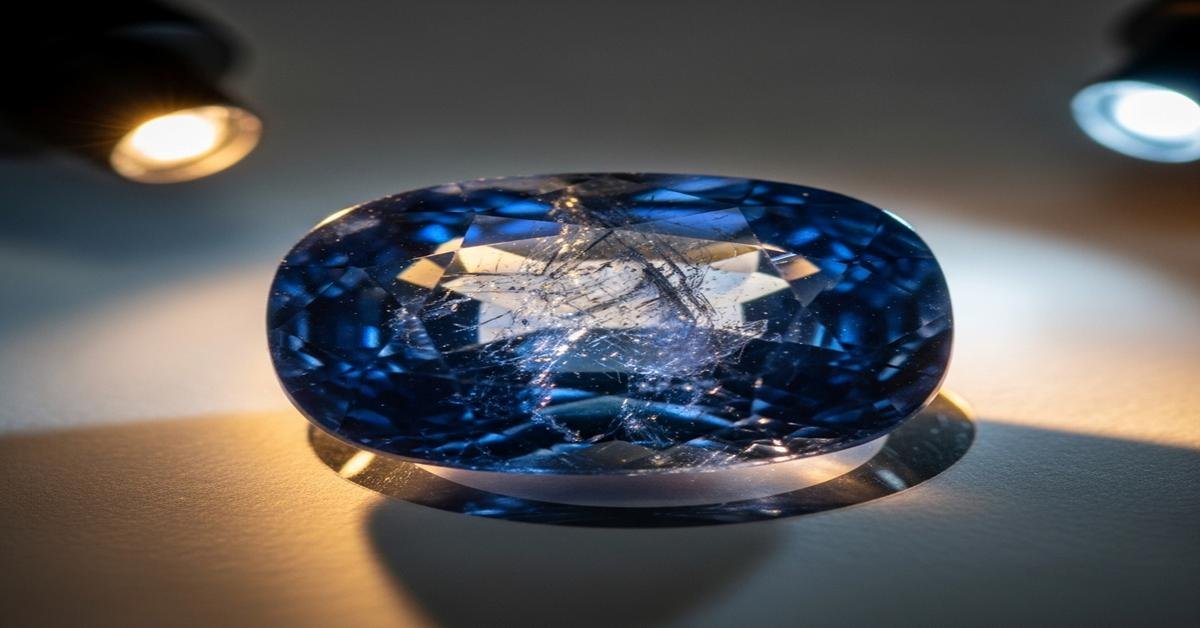
Inspect inclusions at 10× — the clearest clue
Why it matters: heating at 800–1800°C tends to alter or remove many inclusions. What stays and what disappears gives a clue.
- Look for rutile “silk” needles. Straight, needle-like rutile (often called silk) is common in natural, unheated sapphires. Under heat, fine rutile dissolves. If you see lots of fine, intersecting needles, the stone is more likely unheated. Example: a 2 ct sapphire (≈6.5–7 mm) showing dense silk at 10× is often untreated.
- Look for crystal inclusions. Angular crystals (zircon, apatite, spinel) and negative crystals with sharp edges usually survive and indicate natural growth. Rounded or partially dissolved crystals point to heat.
- Check for “healed” or recrystallized features. Curved or rounded walls around inclusions, or flow-like textures, suggest the stone was heated.
Watch for bubbles and glass filling
Why it matters: low-cost sapphires are sometimes filled with lead glass to hide fractures. This is detectable at 10×.
- Round gas bubbles: If you see small, round bubbles inside filled fractures, that indicates glass filling. Natural crystals don’t trap perfectly round bubbles like glass does.
- High sparkle in fractures: Glass-filled fractures often show bright, mirror-like flash or a different sparkle than the host sapphire.
- Surface-reaching fractures that look “wet”: Under magnification, filled fissures often have a smooth, polished look compared with rough natural fractures.
Check color distribution and surface concentration
Why it matters: diffusion treatments (especially beryllium diffusion) or surface-enhancement can create abrupt color concentrations at or near the surface.
- Tilt the stone under strong light: If the color fades quickly toward the pavilion or shows a banded color layer near the girdle, that can indicate diffusion or surface-only treatment.
- Look at facet junctions and the girdle: Color concentrated along facet junctions or only on facet surfaces is suspicious. Natural color usually follows crystal zoning, not only the surface.
Use polarization to see strain and growth patterns
Why it matters: heating changes internal strain. Polarized light reveals strain patterns that differ between heated and unheated stones.
- Use polarized sunglasses: Put the stone on a black cloth and view it through one sunglass lens. Rotate the stone slowly. Natural sapphires usually show uneven strain bands and localized extinction. Heavily heated stones often show more even, washed-out patterns or reduced strain.
- Polarizer + light source: If you have a camera polarizer, hold it between the light and the stone and rotate. Strong, irregular strain lines suggest no or low heating; very weak strain can be a sign of high-temperature treatment.
Observe fractures and “healing” features
Why it matters: heat can heal fractures, leaving distinctive features.
- Healed fractures often look rounded at the edges and can contain flow textures. Fresh, angular fractures point to untreated material.
- Flux residues: Flux-healed stones (heated with fluxing agents) may show silvery reflective films or flow lines near healed areas. These are telltale of a heat treatment using flux.
Context clues: size, setting, and price
Why it matters: market realities matter. Most commercial blue sapphires are heat-treated.
- Price vs. size: A brilliantly saturated 2 ct blue sapphire set in thin 14K gold for a low price is likely treated. Very high prices plus a lab report are needed for a claim of “unheated.”
- Setting and dealer reputation: Heavily included stones sold cheaply are often treated to improve appearance. High-end stones mounted in 18K or platinum and sold with provenance are more likely to be untreated, but always verify.
What these home checks cannot do
Why it matters: avoid false certainty. Some treatments leave no obvious signs to the naked eye.
- No home test can reliably detect subtle high-temperature heating that removed all rutile without leaving obvious recrystallization. Labs use spectroscopy and microscopic analysis to be sure.
- Beryllium diffusion can penetrate deeply and mimic natural color. Only advanced lab techniques and cross-sectioning can confirm it.
- Heated vs. unheated origin sometimes comes down to trace-element patterns (ppm levels of Fe, Ti, Be). You cannot measure that at home.
When to get a lab report
Send the stone for testing if:
- You plan to buy a high-value sapphire (several thousand dollars or more).
- Someone is claiming “unheated” and you need certainty for resale or insurance.
- Your home checks show mixed signals: signs of both silk and healed fractures, or visible bubbles near fractures.
Lab reports from recognized gem labs use microscopy, spectroscopy, and chemical analysis. They give the definitive answer about heat and diffusion.
Bottom line: a 10× loupe, a strong light, and a polarizer will let you spot most obvious signs of heating and filling. Use these tests to reduce risk and to decide when a professional lab report is worth the cost. That tells you not just whether a sapphire was treated, but how to value and care for it.